RTF –> EPUB with a layover in InDesign
I worked on a large conversion project recently, creating EPUB files out of almost 200 RTF files. I needed to move them out very quickly so I invested a little time in figure out the most efficient means to a finished product that was possible. I am sharing my process here with the caveat that it was specific for this project, and this publisher. That said, it has some universal efficiencies which some of you might find useful.
The InDesign Layout
The one thing that made this conversion project stand out from other bespoke conversions, is that this specific publisher want a very plain vanilla ebook with as little design intervention as possible. I fact, I wrote a basic CSS that worked for every title in the bunch. The key, then, to making one CSS file work for a variety of content was to go into the source file to make certain that they were all structured in precisely the same way.
One quirk: importing the RTF files directly into InDesign (using the CC version) often meant that I would lose italics and other formatting. I never did figure out why. As RTF was my only source file for these conversions, I would open them in Word and resave as a “.doc”.
Importing the doc into an InDesign template would bring in unwanted style sheets so I was careful to tiptoe around those. One of the first steps after import, was to do a global search for any styles applied at the character level — italics, bold, superscript, for example — that I wanted retained after I stripped out the Word style sheets. As the vast majority of the titles in this project were fiction, it was mostly just italics that I was searching out, applying an “italic” character style that was mapped to export as a simple <em> tag, without a class. I would then apply the paragraph style “normal” to the entire document and delete the unwanted Word styles, if any. Styles that tagged along from Word will be marked in the paragraph style sheets window.
In the simplest title, the stylesheet selection looked like this:
I have set them up, as you can see, with keyboard shortcuts for hyper-efficiency. One of my developers or I would whizz through a long 500-page novel in about 30 minutes applying paragraph styles to the chapter number and title, removing indents form the paragraphs directly after a header with the “noIndent” style. The idea at this stage was to impose a clear structure onto a loose, amorphous document.
(Some titles had poetry that required a hanging indents, block quotes with varying space before and after needs. More complex titles went in to a template with a fuller set of styles. For the purposes of this piece, I have chosen to keep it simple.)
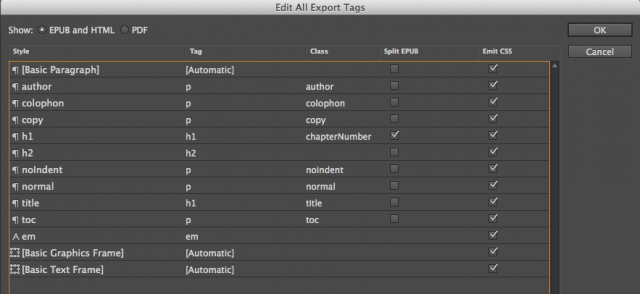
Part of the InDesign template also included some clear, simple style sheet mapping. From the above set you can see in this screenshot how I have mapped everything to straightforward HTML tags.
A note: the title of the book is an <h1> tag as is the chapter number. This is how I prefer to structure for EPUB. Also, the emit CSS toggle is switched on but later in the export process, I will opt to attached a homemade CSS and won’t bother at all with the CSS that comes from InDesign.
Structure is now clearly applied, character styles are where I want them, indents are doing what they are supposed to. As this client wants EPUB 2 (because they work with retailers that aren’t EPUB3 ready yet), and MOBI, the next step is to generate a table of contents. I am careful to make sure that the TOC is exported as a standalone HTML file so that I can point to it in the <guide> in order that my Kindle ebook is created with an navigation document in place.
An aside: I could export without an inline TOC and would counsel EPUB only clients to do that. Because an EPUB comes with built-in navigation (from the NCX or NAV document), an inline TOC is repetitive. But in the interest of creating one file that will push to EPUB retailers and to Amazon, we have opted to include the inline TOC in this set of conversions.
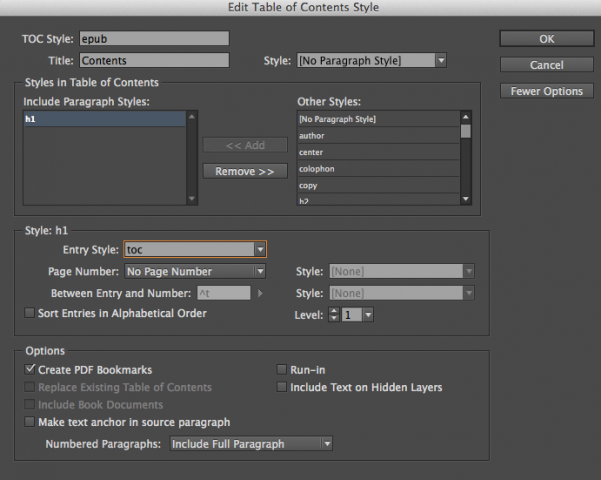
I generate a TOC from a very simple table of contents style that I opt to call “epub”.
Putting an <h1> styled header before the auto-generated content will ensure that I have a standalone HTML file because I opted to break the HTML at the <h1> in that style sheets definitions.
Exporting to EPUB
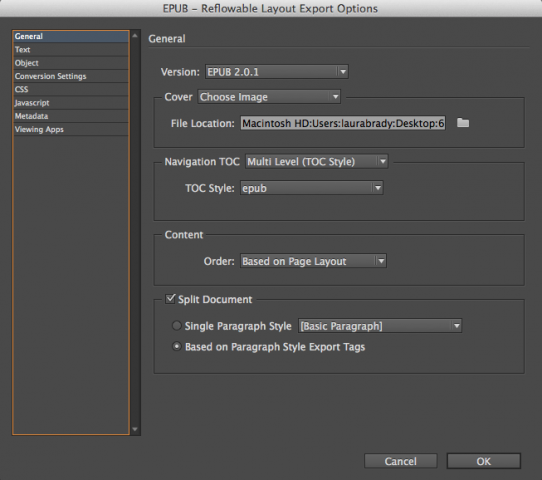
Command-E, opt for reflowable EPUB will get you a powerful set of controls. In this first screen, I have opted for EPUB2 code, to attach a JPEG cover (RGB, sized at just south of 3.2 million pixels), and have pointed to the TOC style that I already set up. The other important piece on this screen is to toggle on the split document based on paragraph style export tags – so that the HTML will split at the <h1> level.
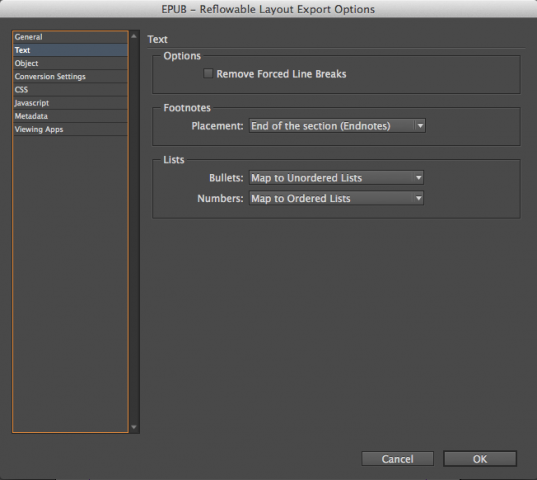
Under text, I leave most of the fields at defaults as below:
If there were images in my ID files, I would opt to keep those relative to the page width in the object menu. As it is I leave the items on the Object and Conversion Settings tabs set to default.
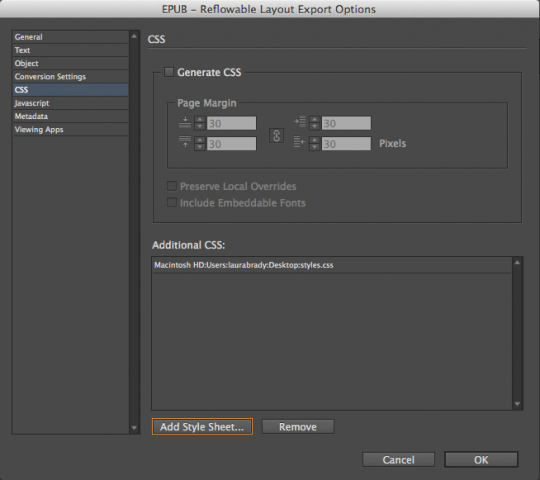
Under the CSS tab, I will opt not to emit CSS and ask InDesign to swap in my custom-built CSS file.
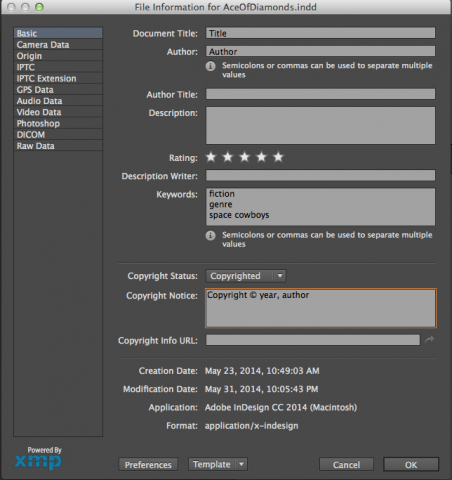
Because I have already been careful to fill in as many fields as possible in the File –> File Info panel . . .
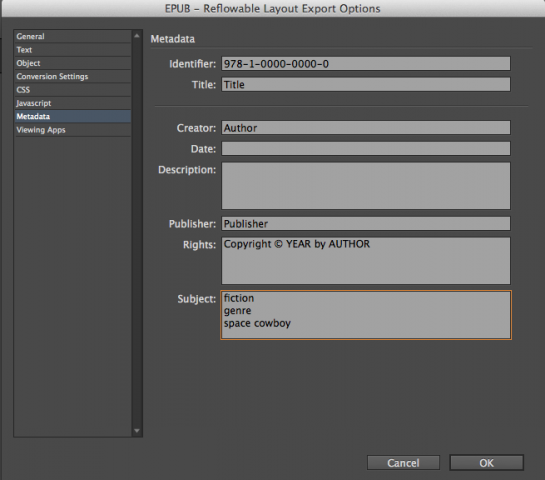
much of the book’s metadata field will already be filled in in this export window.
And that’s it!
Each title gets a full QA sweep to check for quirks in the process. I also open up the EPUB to add a guide to the OPF, and some marketing material to the back of the book. When the QA is done, the EPUB is converted to MOBI via Kindle Previewer and a second QA sweep is performed.
I am always interested in efficiencies. If you have any ideas about how to smooth out this process, please do leave a comment.
Happy converting!
About the Author
Laura Brady is principal at Brady Type, a full-service book design studio specializing in ebook development, custom training, and general publishing problem solving. Laura also teaches and develops custom training programs for publishers. Laura is one of the founding planners behind the annual ebookcraft conference. You can connect with Laura in any of these places:


About that importing of rtf to InDesign: I’ve always had similar problems bringing in .docx files, so am always saving to plain old .doc. Interesting that it is also an issue with rtf.
I’ve not seen a diff in importing .docx vs. .doc to InDesign, myself. But all Word docs often bring in unwanted (and unused even in the Word file) styles.
If you place the Word doc in a throwaway temp InDesign file … just one frame is fine, no need to autoflow it … and then click inside the frame with the Type tool and choose File > Export > RTF, that clears out a LOT of crud. (more than Saving As RTF in Word itself does.).
Then place the RTF file in the “real” InDesign doc, and only the used styles come along for the ride.
I love this multi-book workflow, Laura, and I’m sure your client benefitted from your mastery of it!
> I am always interested in efficiencies.
> If you have any ideas about how to smooth out this process,
> please do leave a comment.
i’d suggest you learn some light-markup (e.g., markdown).
the .rtf would convert to light-markup quickly and easily,
retaining styling and structure, which then moves you
directly to .html, where a little scripting gives you .epub.
i’d guess that approach would take about half the time
of the indesign-mediated workflow you described here.
(and i’d not be surprised if it took a quarter of the time,
given your recently-noted fluency with find-and-replace.)
plus you and your client would then have master-texts
that would be _much_ simpler to edit, revise, remix, etc.
i encourage you to put the light-markup tool in your chest.
you might be amazed how often it’s the most efficient one.
-bowerbird
Bowerbird: I’d love to learn more about how this works: “which then moves you directly to .html, where a little scripting gives you .epub”
What kind of scripts? Do they exist already and can be used as-is? I’m guessing the script would create the OPF and TOC files too…? that would be fantastic.
If you have a URL where this is explained, please share, or maybe Derrick (the editor here) could work with you on a post for epubsecrets.com?
I actually did consider Markdown for this project. But with the InDesign efficiencies detailed here, this was actually a very well-oiled conversion. It took 45 minutes per book, on average, and the client has well-formed HTML plus a bare-bones ID file if they ever chose to go to print again.
Interesting to see the comments about preferred file types: I’ve always found RTF files to be the cleanest imports to InDesign, and always save other formatted documents into RTF before doing the import.
Thanks for the tips. That’s a lot of files to process at one time. Seeing how another developer works is very helpful. I am a stickler about color. When I develop a pallet for a job, I’ll name the swatches after the various paragraph/character styles so the are easily identifiable and I can tweak them on the fly.
http://www.foresthousemedicalcentre.co.uk/pink/ugg-australia-roslynn.html ugg australia roslynn
Almost all of what you say happens to be astonishingly appropriate and that makes me ponder why I hadn’t looked at this with this light previously. This particular piece truly did switch the light on for me personally as far as this particular topic goes. Nevertheless at this time there is actually 1 point I am not really too cozy with so whilst I make an effort to reconcile that with the actual central idea of the point, permit me see just what the rest of your subscribers have to point out.Well done.
Nice!
I’d run into RTF files losing their character formatting on import into ID; I too have no idea why and I too resorted to going through Word. Apple Pages or OpenOffice might create less of a mess when they create Word docs; I’ll have try and see.
One possible suggestion to save a bit more time and to ensure uniformity: use a CSS rule to create the no-indent instances — something like
h1 + p {text-indent: 0}. I realize that some of the more archaic readers (ie, old Nooks and Kindles) won’t display the paragraphs properly, but, to be honest, they won’t necessarily display the class-imposed style either!You could certainly do it within 5 minutes using light-markup—and get a PDF for print which quality would absolutely be the same for such content since a lot of people don’t actually know how to use advanced InDesign tools and could do quite better if they sticked to Word or Pages or Libre Office*.
* And I’m not kidding at all. We’ve run a little experience there for the last two years and 9 out of 10 typesetters/graphic designers (pool of 150+ people) who agreed to take the test do actually make a better job using Word/Pages/Libre Office to the max instead of using InDesign as they are using it—that is, pretty poorly.
I think it is high time we admit InDesign is not the only path to print… and that goes well beyond Word/Pages/Libre Office: there are already tools managing light-markup which are doing the same or quite a better job than most people using big ID.
Actually, as far as I can remember, bowerbird demoed that very well a few months back, in order to show people at O’reilly that it was possible to achieve complex layout and even easy/trivial.
Problem is, we are not listening to the people who know better. Sometimes, we are even putting frauds on a pedestal. I’m not targeting anybody at all there but I guess we all know which ones are fraud and, oh boy, do they hurt e-production.
sorry for the delay in responding, anne-marie,
i didn’t return to see if there was any follow-up.
yes, the scripts are to make the .opf and .ncx.
i’ve written such scripts 3 or 4 times, so i can
dig them out if you really need me to do that,
but — having written them 3 or 4 times — i can
tell you that it is not a big deal to write them,
especially if you already know how to .opf/.ncx.
-bowerbird
p.s. and, in looking at this post again, i would
suggest that anybody with a project like this
would benefit from looking at the binary .rtf,
to write a script to convert it to light-markup.
.rtf has markup for italics/bold just like .html.
(also see pandoc, which might do it for you.)
p.p.s. it’s best to respond to me on #eprdctn.