Why I Use Page List, and How

Robust navigation is a hallmark of EPUB3. Along with the reading system table of contents and the inside-the-book contents, Landmarks and Page List add value and functionality. They’re simple additions that make a book more accessible and easier to use.
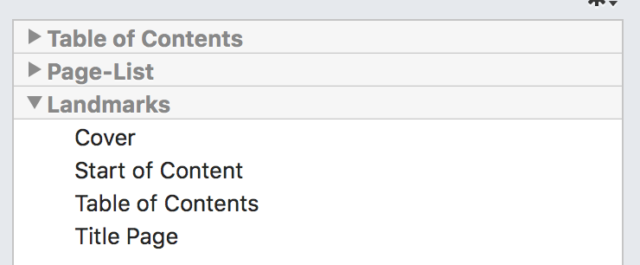
Landmarks itemizes the cover, start of content, chapter, index: major book sections and elements. If you export EPUB3 from InDesign, Landmarks is generated automatically when you designate a cover and when you choose an InDesign-created table of contents, for example. Here’s a screenshot from Adobe Digital Editions:
Page List is a simple listing that links an ebook to page locations in the print edition. But there’s no built-in Page List generator in InDesign. Luckily, Rorohiko (at the urging of Laura Brady, editor of epubsecrets.com) has written a pair of scripts that make the creation pretty simple to use.
Why Page List?
Here’s a screenshot from Adobe Digital Editions showing Page List in action:
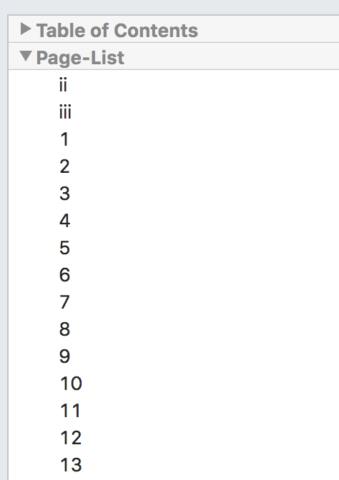
Pretty simple: it’s a linked list of ebook locations that correspond to pages in the print edition.
How Is this Helpful Today?
Think about your local book club or classroom, with some readers downloading ebooks from their library and reading on ADE while others have the print editions. The Page List is a quick way for all to be on the same page for discussion.
Step 1: InDesign + PageStaker
If you export EPUB from InDesign, you’re in luck: the scripts developed by Rorohiko and sold by Brady Type (link below) make it easy.
The InDesign step uses PageStaker.
First, install PageStaker in InDesign’s scripts folder. (See below for a link to an InDesign Secrets post on how to install scripts.)
To run, open your scripts panel and just double-click on the script name.
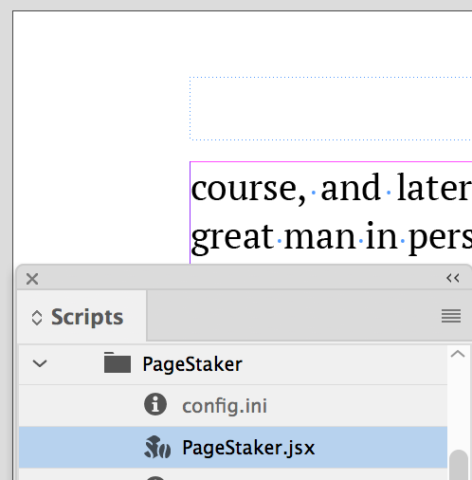
The script goes through the book and adds a marker before the first character in the first text frame it finds (with some exceptions; see below). It actually adds two pieces: the caret (seen below) and a bit of conditional text, which is the page number that the post-export script will add to the HTML after export. (Note that on occasion when I run PageStaker the text seems to disappear from the frame; it’s still there, though. Just toggle Conditional Text on and off and your view will be restored.)
![]()
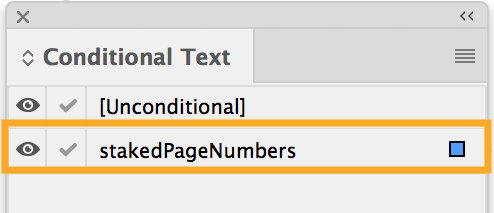
To see the conditional text, highlight the first word in the text frame (or place your cursor in front of that word), turn on the Conditional Text option (Window/Type & Tables/Conditional Text), and view the Story Editor version of the text frame (Command/Cntrl Y, or choose from the Edit menu). The caret disappears and is replaced by the conditional text.
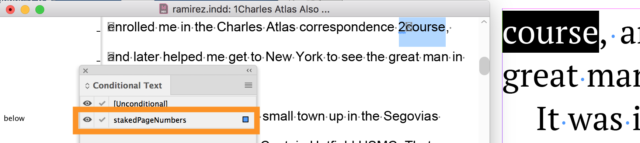
The Story Editor view is on the left; the highlighted 2course shows the conditional text that PageStaker inserted indicating that this is page 2 of the InDesign document.
When to Run PageStaker
I run PageStaker early in prepping a file for EPUB export because I almost always cause some kind of reflow when anchoring objects or sidebars, for example. Using the script early guarantees that the script places its marker in the right place.
Check Stake Placement
There are a couple of caveats when working with PageStaker. They only come up for me when I’m working on someone else’s mechanical; now that I’m using PageStaker regularly I know what the script likes and so I build my documents accordingly.
The first thing to be aware of happens if your design calls for two columns. If the columns are set up as distinct text frames, instead of one frame divided into columns, PageStaker will sometimes insert the marker at the top of the second column instead of the first.

That’s easy to fix; just open Story Editor and copy and paste the marker to the correct position.
A free script (MergeTextFrames from Ajar Productions; link below) lets you zip through your document and combine those multiple columns into one and avoid this issue. Be careful using this script, as it cuts the text thread and creates a single, unthreaded text frame.
If you’re setting up a new template for print and EPUB export, simply use one text frame and divide into columns as needed. Problem solved.
A similar issue is when you have multiple text frames on a page. Say you have an image and caption at the top of a page, followed by the threaded text frame. PageStaker will stake the text frame, not the caption frame. If you want to be truly accurate about marking the page location, you’ll want to ensure that the image is marked as the beginning of the page.

Similarly, if an image takes up the entire page and there is no text box to place a stake in, PageStaker will pass that page by. You can address these issues after export, once you’re working in the HTML. You can add a page marker to the HTML page along with a new entry in the page listing itself (see below for examples).
The bottom line: check any pages that have multiple text boxes (text, captions, tables, sidebars) to ensure the stake has been placed at the most appropriate spot. For any adjustments, either use Story Editor to move the tags or else do it post-export in the HTML.
How to Export to EPUB3
It’s simple: activate Conditional Text (Window/Type & Tables/Conditional Text) and go through your usual EPUB3 export routine.
Step 2: HTML + EPUBOgrify
This is where the second script comes in: EPUBOgrify. It, too, is simple to run.
This is an application that sits on your desktop waiting to have an EPUB3 dropped on it. With its helper file (SampleConfig2.ini), it converts those stakes inserted by PageStaker into unique ids in the HTML and also builds the Page List for you, practically ready to drop into your toc.xhtml.
Here’s what to do
- Duplicate SampleConfig2.ini and change the name of the dupe to match your EPUB: mybook.ini
- Put mybook.ini in the same folder as mybook.epub.
- Drop mybook.epub on top of EPUBOgrify (the app can be anywhere; it doesn’t need to be in the EPUB’s folder).
You’ll get a new unzipped folder: mybook.upd. This is your new working folder; use it instead of mybook.epub.
You’ll also see a new text file: mybook.txt. It contains your page list, almost ready to drop into your toc.xhtml.
Do Some Housekeeping
EPUBOgrify creates a text file (mybook.txt). Here’s a sample:
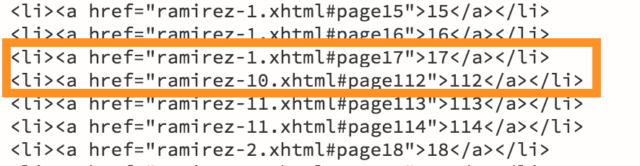
It’s an ordered list, just what you need to add to toc.xhtml.
But there is often one problem: Some page numbers are out of order. See how page 112 follows page 17? That’s a straightforward fix (just read through the list and move lines where necessary), but be aware that it will likely happen.
Into the toc.xhtml
Since InDesign doesn’t include the page list to the EPUB3 navigation file, the toc.xhtml, you’ll need to do it. Here’s the markup to add; I put it beneath the Landmarks navigation list that InDesign does create.
<nav epub:type="page-list" hidden="">

<h1>List of Pages</h1>

<ol>

<li>add list generated by EPUBOgrify here</li>

</ol>

</nav>
Here it is in action:

Why hidden=””?
Notice on line 35 that the markup includes hidden=””. What’s this do?
Ebooks have an inside-the-book table of contents along with the reading system’s listing. The toc.xhtml populates the reading system’s listing, but you can also use it in the flow of the book.
The hidden=”” designation hides the page list from display when shown as a page in the ebook, but keeps it intact for the reading system’s use.
Kindle Look-Inside and the toc.xhtml
Back in September 2017 I discovered a glitch in Kindle’s Look-Inside feature: the reading system used by Look Inside ignores hidden=””. So it displays your long page list if the inside-the-book contents page is part of the sample. Check out the link below for the whole story and how to work around the problem.
In the HTML
Unless you need to move or add page list IDs, you won’t need to do anything in the HTML, but here’s what the page designation looks like after running EPUBOgrify: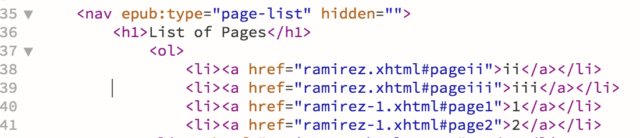
Summing Up
Page List is a valuable feature to add to every ebook. It makes the book more useful to more people reading in various environments. Even if there’s no print equivalent, it’s just a useful navigation tool.
Links
Get your copy of the PageStaker/EPUBOgrify by emailing Laura here:
laura@bradytypesetting.com
How to install scripts
https://indesignsecrets.com/how-to-install-scripts-in-indesign.php
Merge TextFrame
https://ajarproductions.com/blog/2017/07/17/merge-textframes-for-indesign-updated-with-highly-requested-features/
Kindle Look-Inside Fail
http://epubsecrets.com/amazon-look-inside-fail.php
Much more information on building accessible content in InDesign in my recent article for InDesign Magazine: Building Accessible EPUBs with InDesign
https://indesignsecrets.com/building-accessible-epubs-indesign.php
Something I’ve noticed and to look out for using PageStaker 1.0.4 are hyphenated words between pages/text frames. If there is a hyphenated word that splits two text frames, for example pages 88 and 89 of a book, PageStaker will place the page 88 number on page 89 next to the number 89, so you will see the two page numbers together (eg 8889). You can correct me if I’m wrong, as this may have been addressed in PageStaker 1.0.6, I just haven’t had time to test it yet.
Aaron, that’s been fixed in the recent update. The stake and are now placed at the end of the hyphenated word.
Hi, I’ve been working on a book using these scripts and cannot figure out how to produce a result that does not have tiny numbers embedded in the file. yet is also still capable of working with EPUBOgriphy the correct way–producing the TOC doc.
Is there a way to export an epub that has the required coding in order to run the ePUBogriphy script to generate the TOC necessaries that doesn’t litter the book with the tiny numbers?